")
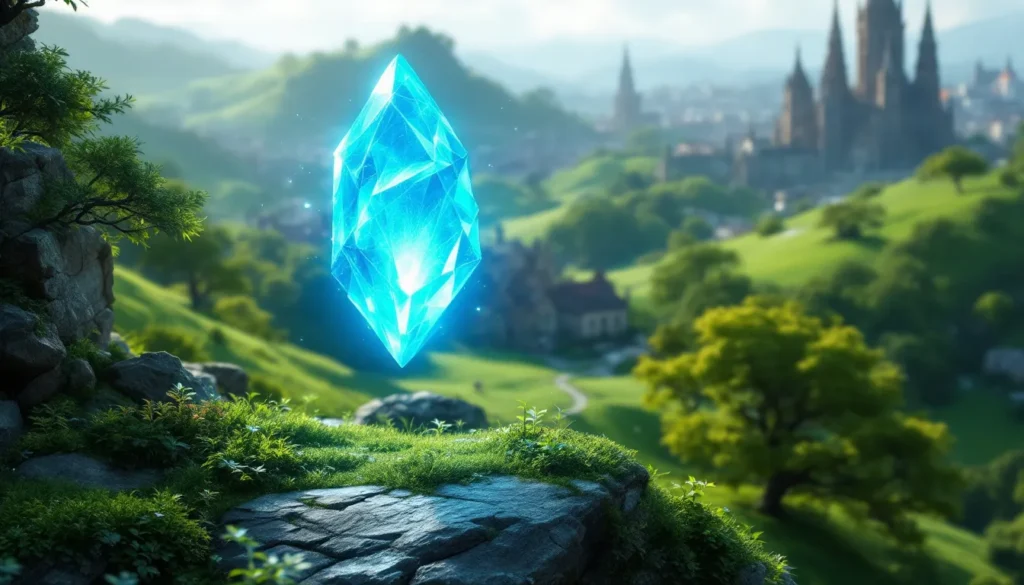
Table of Contents
ToggleHunting for Anemoculi in Genshin Impact is one of those tasks that sounds straightforward until you’re wandering around Mondstadt for the hundredth time, missing just one or two shards. These wind elemental fragments are scattered across the map in ways that range from obvious to “why would anyone put it there?”, and collecting them all unlocks significant rewards. Whether you’re a newer player powering up the Statue of the Seven or a veteran trying to 100% exploration, knowing exactly where to find Genshin Impact anemoculus locations saves hours of frustration. This guide breaks down every known location, from the common pickups to the puzzle-locked ones that require specific platforming skills or character abilities. By the end, you’ll have a complete roadmap to snag every single shard.
Key Takeaways
- There are 66 total Anemoculi locations across Mondstadt, Dragonspine, and Windy Highlands that unlock essential Vayuda Turquoise ascension materials for Anemo characters like Kazuha and Venti.
- Interactive fan-made maps and character abilities (especially Kazuha and Venti) make hunting Anemoculus locations significantly faster and easier than manual exploration.
- Most Anemoculi are straightforward pickups, but some require solving wind current challenges, Anemo Seelie puzzles, or timing-based collection in cold zones like Dragonspine.
- Offering all Anemoculi to the Statue of the Seven in Mondstadt grants 75 primogems, stamina boosts, and allows you to fully ascend Anemo characters—making it essential for serious players.
- The first 40 Anemoculus shards come naturally through casual exploration, while the final 26 require deliberate searching with focused runs through each region.
What Are Anemoculi and Why You Should Find Them
Understanding Anemoculus Basics
Anemoculi are small, glowing wind elemental shards found throughout the Mondstadt region. They’re distinct from other collectibles in Genshin Impact because they’re specifically tied to the Statue of the Seven, Anemo edition. Each shard pulses with cyan-blue energy and typically hovers near structures, under trees, or tucked into corners of the map. Unlike Geoculi in Liyue or Electroculi in Inazuma, Anemoculi appear only in Mondstadt and were the original collectible type introduced when the game first launched.
There are 66 Anemoculi total across Mondstadt. Finding them all is entirely optional, the game doesn’t force completion, but the rewards make the hunt worthwhile. The collectibles don’t affect your main story progression, but they do improve your character levels and unlock buffs tied to that specific region’s elemental essence.
Benefits of Collecting All Anemoculi
The primary reason to collect Anemoculi is the leveling system tied to the Statue of the Seven. As you offer shards to the statue in Mondstadt City, you unlock higher levels for your Anemo characters’ ascension materials. Specifically, leveling the statue unlocks Vayuda Turquoise, which is required for Anemo character promotions, characters like Kazuha, Sucrose, Venti, and others depend on these materials.
Beyond character leveling, collecting all 66 Anemoculi grants an achievement and rewards you with primogems (the premium currency used for wishes). You also gain a stamina boost per shard offered to the statue, up to a cap. This means completing the full set makes exploration slightly easier because your climbing and sprinting drain stamina more slowly.
For players aiming for 100% exploration and achievement hunters, Anemoculi collection is non-negotiable. The challenge itself appeals to players who enjoy thorough map exploration, it encourages discovering corners of Mondstadt you might otherwise miss.
Anemoculus Locations in Mondstadt
Central and Eastern Mondstadt
The heart of Mondstadt and its eastern reaches contain roughly 20-22 Anemoculi. Many are clustered around the main city and nearby landmarks, making them good starting points for new collectors.
Mondstadt City proper has several shards:
- One sits on top of the cathedral roof (requires climbing or gliding from above)
- Another is lodged behind the front gate near the city entrance
- Look for one near the market stalls on the main plaza level
- One rests atop the tavern (requires climbing the exterior)
Whispering Woods, directly east of the city, contains multiple Anemoculi:
- Near the entrance, one floats above the grass area
- Several are tucked into the tree-filled zones: use the wind currents to access them
- One sits on a cliff edge overlooking the water
Starfell Valley (east of the woods) holds shards in scenic but somewhat hidden spots:
- One is located on a rock formation near the valley’s center
- Another sits along the river at the valley’s edge
- Check elevated platforms, some require gliding from nearby cliffs
Thousand Winds Temple region:
- Multiple shards surround the temple structure itself
- One hovers above the central platform: you’ll need height to reach it
- Others are scattered around the exterior grounds
Western Mondstadt and Starfall Lake
The western side of Mondstadt is heavier on puzzle locks and environmental puzzles. Expect fewer obvious pickups and more strategic placement.
Wolvendom (northwest territory):
- One shard sits near the Wolvendom domain entrance
- Another is lodged on a higher cliff overlooking the area
- These tend to be more straightforward finds
Starfall Lake (west of Mondstadt proper):
- This area has around 10-12 Anemoculi with trickier placements
- One requires solving a small wind puzzle involving Anemo Seelies (blue sprites you lead to their destination)
- Several are positioned on rock formations in the middle of the lake, gliding is essential
- Look on small islands within the lake: some are easy to miss because they’re out of your natural travel path
Springvale (southern entrance region):
- This transitional zone between Mondstadt and other regions has a few shards
- One sits near the Springvale village itself
- Others are on the hills surrounding the area
For the western sections, using a character with mobility abilities (like Kazuha or Venti) makes collection significantly faster. The area relies heavily on vertical positioning and wind current navigation.
Anemoculus Locations in Dragonspine
Dragonspine is a temperature-heavy zone added in version 1.2, and it contains roughly 10 Anemoculi. These shards are found alongside Crimson Agate collectibles and require careful navigation due to the region’s cold mechanics. Unlike regular Mondstadt areas, Dragonspine demands attention to elemental status: you’ll take continuous cryo damage if you stay in cold areas too long without proper buffs.
Upper Mountain Areas
The peak of Dragonspine and its upper slopes hold several shards in exposed, windier locations.
Summit and upper ridges:
- One shard floats above the high plateau at the mountain’s peak
- Another sits on a narrow ledge requiring precise platforming
- These upper shards are more visible from a distance but harder to physically reach
Near the Alchemy Ascension Domain:
- This domain location has an Anemoculus on a nearby rock formation
- Approach from the side to avoid unnecessary cryo exposure
- The shard is visible from the domain entrance
Peak lookout points:
- Several shards are positioned on the extreme edges of cliffs
- Gliding from higher elevations is the safest collection method
- Watch for wind currents that can push you off course
Lower Mountain and Cave Locations
Lower Dragonspine has more enclosed, sheltered placements, some within caves and caverns.
Entombed City cave:
- This underground region has 2-3 Anemoculi hidden within
- One requires navigating past cryo enemies
- Another is positioned on an elevated platform inside the cave system
- The temperature mechanic is less punishing underground, making these easier to collect safely
Around the Warming Seelie:
- The Warming Seelie (red sprite you interact with to reduce cryo damage temporarily) areas have nearby shards
- Position yourself near the seelie’s location before collecting to maintain warmth
- One shard is just outside a warming zone, time your collection
Sheer cliff faces:
- Lower slopes have shards on vertical rock walls
- Climbing is safer than gliding in Dragonspine due to wind patterns
- Use characters with stamina-recovery abilities to conserve resources
Anemoculus Locations in Windy Highlands and Pale Flame Domain
Windy Highlands, introduced in version 2.0 (Inazuma’s launch patch), is a newer Mondstadt subregion that contains additional Anemoculi. This area is more exposed and wind-heavy, making it feel distinct from the core Mondstadt zones.
Scattered plateau locations:
Windy Highlands has roughly 4-6 Anemoculi spread across its open terrain. The zone is less forested than traditional Mondstadt, so shards are more visible but still require active searching.
- One sits on a prominent rock formation in the zone’s center
- Another floats above a grassy plateau: wind currents will push it gently
- Several are positioned on cliff edges overlooking the landscape
- The shards here are less likely to be puzzle-locked: most are just positioned in high or visible spots
Navigation tips for Windy Highlands:
Because this zone is flatter and more open than Starfall Lake, it’s easier to spot Anemoculi from a distance. But, reaching them sometimes requires gliding from specific angles or using wind currents strategically. The “wind” aspect of the zone’s name is literal, wind currents are more prominent here and can either assist or hinder collection depending on your approach.
Pale Flame Domain adjacent areas:
While the Pale Flame Domain itself doesn’t contain Anemoculi (it’s an artifact-farming domain), the surrounding landscape has a few shards nearby that players often confuse with the domain itself.
- One shard is on a rock near the domain entrance
- Another is visible from the domain but requires backtracking to collect
- These are straightforward pickups, no puzzles required
For newer players, Windy Highlands Anemoculi are often the last batch found because the zone itself is less frequently visited compared to core Mondstadt areas. It’s worth making a dedicated trip once you’re closing in on the final count.
Hidden Puzzles and Hard-to-Find Shards
Some Anemoculi aren’t just sitting there waiting to be picked up. A handful require solving environmental puzzles, completing specific challenges, or meeting precise conditions. These are the shards that separate completionists from casual collectors.
Wind Current Challenges
Several Anemoculi are positioned such that you must ride wind currents to reach them. These aren’t traditional puzzles, they’re more about understanding map geometry and positioning.
Starfall Lake wind current shard:
One Anemoculus in Starfall Lake is suspended above the water and accessible only via specific wind currents. You need to:
- Identify the wind current’s starting point (usually marked by a slight visual shimmer)
- Glide into it at the correct angle
- Ride the current upward to reach the shard’s height
- Grab it mid-flight or hover nearby
This requires practice if you’re unfamiliar with wind current mechanics. Using a character with increased glide time (like Amber with her passive talent) can make this easier.
Whispering Woods elevated shard:
Another wind current challenge exists in the tree-heavy Whispering Woods. A shard hovers above tree canopy height and requires:
- Climbing to an elevated position first
- Diving off the cliff to gain downward momentum
- Catching an updraft at precisely the right moment
- Maneuvering mid-air to grab the shard
This one has a higher skill floor: it might take multiple attempts.
Puzzle-Locked Anemoculi
True puzzle-locked shards are rare, but they exist. These require interacting with the environment or meeting specific conditions.
Anemo Seelie puzzle (Starfall Lake region):
One Anemoculus is locked behind an Anemo Seelie puzzle. The process:
- Find the blue Anemo Seelie sprite in the Starfall Lake area
- Lead it to its destination (follow the glowing trail it leaves)
- Once you complete the seelie’s journey, an Anemoculus appears nearby
- Collect the newly spawned shard
Anemo Seelies move slowly, so patience is required. The puzzle itself isn’t combat-based, it’s pure navigation and puzzle-solving.
Pressure plate and elemental activation puzzle (Wolvendom):
One shard in Wolvendom is locked behind a mechanism requiring:
- Stepping on a pressure plate (hold it for a few seconds)
- Using an Anemo ability near a stone structure to activate a secondary mechanism
- The Anemoculus then becomes accessible
This puzzle requires at least one Anemo character in your active party. Characters like Lumine (Anemo), Venti, Kazuha, or Sucrose work perfectly.
Timing-based collection (Dragonspine):
Due to Dragonspine’s cold mechanic, one Anemoculus requires careful timing. It’s positioned in a high-cold area, and you must:
- Activate a nearby Warming Seelie to reduce cryo damage
- Sprint to the shard’s location before the seelie buff wears off (roughly 20-30 seconds)
- Collect the shard before cryo damage overwhelms your character
Using a Pyro character to self-apply warmth (like Bennett or Amber) can extend your window.
Tools and Tips for Efficient Anemoculus Hunting
Hunting 66 Anemoculi manually without assistance is tedious. Fortunately, several tools and character strategies make the process significantly faster.
Interactive Maps and Resources
Fan-made interactive maps are your best friend. Sites like Genshin Impact Map (by HoYoLAB community) and specialized third-party tools let you:
- Toggle Anemoculus markers on and off
- Filter by region (Mondstadt, Dragonspine, Windy Highlands)
- Check off shards you’ve already collected
- See exact coordinates and approach routes
These maps often include user-submitted tips on tricky collections. For example, one map notes that a specific shard in Starfall Lake is “easier to collect after 6 PM in-game time” because of lighting changes that make it more visible.
Popular gaming resource sites like Game8 provide video guides showing the exact path to every shard, which is invaluable for puzzle-locked ones. Similarly, GamesRadar+ publishes written guides with screenshot annotations.
In-game adventurer handbook:
The handbook has a collectibles section that doesn’t pinpoint shards but does count how many you’ve found in each region. This helps you narrow down which areas still have uncollected shards. Once you know “I’m missing 2 in Starfall Lake,” you can focus your search more effectively.
Character Abilities for Easier Collection
Certain characters with specific abilities trivialize Anemoculus collection.
Kazuha (Anemo, Sword):
Kazuha’s Chihayaburu ability lifts him into the air, providing height to reach elevated shards. His elemental skill resets on enemies, so in areas with mobs, you can chain multiple jumps to reach otherwise inaccessible spots. His passive talent also increases glide speed, making traversal faster.
Venti (Anemo, Bow):
Venti’s Wind’s Grand Ode creates an updraft that lifts both him and nearby teammates. This updraft can reach extremely high Anemoculi. But, his usefulness is limited to shards directly above: his ability doesn’t help with horizontal puzzles. Venti features prominently in team composition guides across the site.
Xingqiu (Hydro, Sword) or other stamina-conscious characters:
For shards requiring extended climbing, characters with passive talents that reduce stamina consumption are helpful. Mika (Cryo, Polearm) reduces stamina consumption for climbing team-wide, using him in your exploration party saves stamina across the board.
Amber (Pyro, Bow):
Amber’s passive talent increases glide time, which is useful for wind current challenges. She’s also a free-to-play character, making her accessible early on. Her mobility is less consistent than Kazuha’s, but her consistent stamina reduction for gliding is valuable.
Pro tip: Build a dedicated exploration team with high mobility. Include at least one character with climbing/jumping advantages and one with utility (like Zhongli for shields if you’re exploring dangerous areas). This setup lets you focus on collection rather than survival.
Redeeming Your Anemoculi for Rewards
Offering Anemoculi to the Statue
Once you’ve collected Anemoculi, you need to offer them to the Statue of the Seven (Anemo) located in Mondstadt City. The statue is a large stone structure in the upper plaza of Mondstadt, easily recognizable and impossible to miss.
How to offer shards:
- Approach the Statue of the Seven (Anemo version, it glows cyan-blue)
- Interact with it (default is held E on PC, X on controller)
- Select “Offer Anemoculus” from the menu
- Choose how many shards to offer (you can offer multiple at once)
- Confirm the offering
There’s no downside to offering shards: you gain all benefits immediately. Unlike some games, Genshin Impact doesn’t punish you for offering collectibles quickly rather than hoarding them.
Offering progression:
The statue has 10 levels. As you offer more Anemoculi, you progress through levels:
- Levels 1-6 require fewer shards per level
- Levels 7-10 require more shards and are the grind portion
- Once maxed, you’ve unlocked all Vayuda Turquoise materials and ascension rewards
Most players reach level 6 with casual collection. Hitting level 10 (which requires offering all 66 shards) is where serious completionists focus.
Rewards Breakdown and Progression
Vayuda Turquoise materials:
Every level unlock grants Vayuda Turquoise fragments, chunks, and gemstones, the ascension materials for Anemo characters. The exact numbers scale with level:
- Early levels: 1-2 fragments per level
- Mid levels: 2-3 chunks per level
- Late levels: 1 gemstone per level (the rarest tier)
These materials are required for leveling Anemo characters like Kazuha, Sucrose, Venti, Wanderer, and others from ascension level 1 to their maximum. Without Vayuda Turquoise, you can’t fully level an Anemo character.
Primogem rewards:
Every level unlock also grants primogems (the premium currency). The rewards scale:
- Levels 1-5: 5 primogems per level
- Levels 6-10: 10 primogems per level
Total primogems from maxing the statue: 75. That’s less than a single wish pull (which costs 160 primogems), so don’t expect this to fund your gacha needs. But it’s bonus currency you wouldn’t otherwise get.
Stamina boost:
You also gain stamina capacity increases. Each shard increases your max stamina by a small amount (roughly 1 per shard, capping around 40-50 total increase). This makes exploration marginally easier, climbing, gliding, and swimming drain stamina more slowly.
Progression pace:
For casual players, reaching level 6 takes a few days of light searching. Reaching level 10 requires dedicated hunting, typically taking 2-4 weeks depending on how thoroughly you search each region. Many players skip full completion because the reward scaling diminishes after level 6: the primogem gains and stamina boosts at levels 7-10 are minimal compared to the effort required.
Check where you stand: Open your character screen, navigate to “Profile,” then check the Anemoculus counter in the top right. This tells you exactly how many you’ve collected versus the total (66), helping you determine if full completion is worth your time.
If you’re exploring Genshin Impact characters and builds, Anemoculus collection pairs naturally with exploring different teams. As you level Anemo characters, you’ll naturally accumulate Anemoculi from exploration. Pairing your search with character building, like leveling Albedo or discovering Arlecchino‘s playstyle, makes the grind feel productive.
Conclusion
Hunting for all 66 Anemoculi in Genshin Impact is a marathon, not a sprint. You’ll find the first 40 or so naturally through exploration and curiosity. The final 26 require deliberate searching, often with the help of interactive maps and dedicated runs through each region.
The core value of Anemoculus collection lies in powering up Anemo characters and unlocking ascension materials you can’t get anywhere else. If you’re building a strong Kazuha, Venti, or Sucrose, you’ll need those Vayuda Turquoise shards. If you’re a completionist chasing 100% exploration, Anemoculi are non-negotiable.
Start with the obvious pickups in Mondstadt proper and Starfall Lake, then move to trickier zones like Dragonspine and Windy Highlands once you’ve got the easy ones down. Use character mobility to your advantage, leverage fan-made maps to avoid wasting time, and don’t feel pressured to finish all 66 if the diminishing returns on later levels don’t appeal to you.
Most importantly, enjoy the exploration itself. Genshin Impact’s world design is meticulous, and hunting Anemoculi forces you to truly see every corner of Teyvat. You’ll stumble onto enemies, chests, domains, and scenic vistas you’d otherwise miss. The shards are the excuse: the journey is the real reward.