")
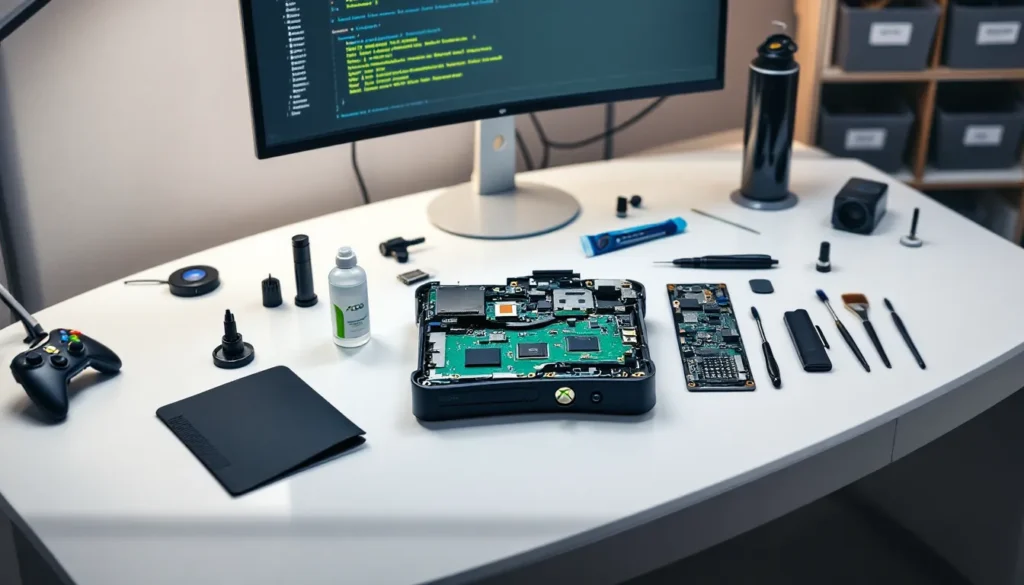
Table of Contents
ToggleThe Xbox 360 dominated gaming from 2005 through the early 2010s, and plenty of consoles are still running strong today, though many show their age. Whether you’ve got a console gathering dust or one that’s acting up, knowing how to repair your Xbox 360 can save you serious cash and breathing room before deciding between a fix or replacement. This guide covers the most common hardware failures gamers face: the infamous Red Ring of Death, disc drive read errors, overheating, and controller issues. You’ll learn how to diagnose problems, attempt repairs yourself, and recognize when professional help makes sense. Let’s get into it.
Key Takeaways
- Xbox 360 repair for common issues like the Red Ring of Death, disc drive failures, and overheating can save hundreds of dollars compared to buying a replacement console.
- The Red Ring of Death is typically caused by thermal damage to motherboard solder joints; cleaning internal dust and reapplying thermal paste often resolves the issue without professional help.
- Disc drive read errors frequently result from laser lens dust accumulation, which is fixable through gentle lens cleaning with isopropyl alcohol before considering drive replacement.
- Controller wireless connection problems are usually solved by replacing batteries, re-pairing within 10 feet of the console, or testing with a spare receiver to identify which component is faulty.
- Quarterly maintenance including dust removal with compressed air and proper console ventilation prevents the majority of Xbox 360 hardware failures and extends the console’s lifespan significantly.
- Knowing when to DIY repair versus seeking professional service depends on repair complexity and cost—simple fixes are worthwhile, but replacing expensive components often makes buying a refurbished console more cost-effective.
Understanding Common Xbox 360 Hardware Problems
The Xbox 360 is a powerhouse, but it’s also notorious for hardware failures. Understanding what typically breaks and why helps you stay ahead of trouble and know which repairs are worth attempting.
The Red Ring Of Death (RROD)
The Red Ring of Death remains the console’s most infamous failure mode. When three of the four LED lights around the power button turn red, your Xbox 360 has encountered a critical hardware error, most commonly thermal damage to the motherboard’s solder joints. This happens because the console doesn’t dissipate heat efficiently, and constant thermal cycling causes micro-cracks in the solder connections. The RROD is frustrating because it’s often a design flaw rather than user error.
Early-generation Xbox 360 models (original white consoles especially) were particularly vulnerable. The problem became so widespread that Microsoft extended the warranty to three years for RROD failures, a move that cost them millions. The issue stems from poor thermal management and tight tolerances in manufacturing rather than individual defects. If you see the red ring, your console has overheated or is about to, and immediate action prevents complete board failure.
Disc Drive Failures And Read Errors
The Xbox 360’s disc drive is another weak point. Over time, the laser lens collects dust and the drive mechanism wears out, causing the console to fail reading discs, even ones that previously worked fine. You’ll see errors like “Disc Error” or “Unable to Read Disc” when trying to launch games.
This happens for a few reasons. The laser lens degrades naturally, dust accumulation blocks the beam, and mechanical parts simply wear with use. Disc drive failures often happen gradually: first you notice occasional read errors on certain discs, then the problem spreads to most games. The console’s location (horizontal or vertical) and ambient temperature affect failure rate. Units stored in dusty, warm environments tend to fail faster.
Overheating And Fan Issues
Overheating is the root cause of multiple Xbox 360 failures. The console generates significant heat, and if airflow is restricted, whether by dust, improper ventilation, or the console’s position, temperatures climb fast. The cooling fan can also fail, reducing airflow and causing thermal stress on components.
You’ll notice overheating when the console gets unusually hot to the touch, shuts down unexpectedly during gameplay, or the fan runs constantly at high speed. Some units develop what gamers call a “jet engine” fan noise as the system desperately tries to cool itself. Overheating can trigger the RROD, cause game freezes, or lead to spontaneous shutdowns. Preventing overheating is often cheaper than fixing the damage it causes.
Diagnosing Your Xbox 360 Before You Start Repairs
Before you crack open your console, diagnose the actual problem. A proper diagnosis saves time and prevents you from wasting effort on repairs that won’t fix the real issue.
Reading Error Codes And LED Indicators
The Xbox 360 communicates problems through LED light patterns. The power button has four quadrant lights arranged in a circle. Each pattern tells you something different:
- One red light (top-right): General hardware error (often thermal).
- Two red lights (top and bottom): Overheating shutdown. Let the console cool for at least 30 minutes.
- Three red lights (RROD): Critical hardware failure. Usually thermal damage but could indicate RAM or GPU failure.
- Flashing all four lights: DVD drive error.
- No lights at all: Power supply issue.
If your console displays an error code on-screen (like E71, E79, or others), write it down. Different error codes point to different hardware problems. E74, for example, often indicates GPU failure, while E71 suggests RAM issues. You can look up error codes on gaming forums or archived support pages to narrow down the culprit.
Testing Basic Functionality
Start simple: does the console power on? Does it recognize controllers? Can it read a disc? These basic tests eliminate obvious issues before you jump into the repair process.
Try booting the console to the dashboard. If it reaches the main menu, the motherboard isn’t completely dead, good news. Launch a game disc. If the drive tries to read but fails, the laser or drive mechanism is likely the problem. If the drive isn’t even recognized, check the power connection to the drive itself (you’ll need to open the case). Test wireless controllers by attempting to pair them. If controllers won’t connect, the wireless module or receiver might be failing.
Pay attention to noise levels too. A loud, grinding sound from the disc drive suggests mechanical failure. A high-pitched fan noise indicates thermal stress. Document everything you observe because it’ll guide your repair choice.
Step-By-Step Repair Methods For RROD And Thermal Issues
RROD repairs require opening the console, so commit to this only if you’re comfortable with electronics work. Warranty is already gone anyway if you’re dealing with RROD, so there’s little to lose.
The X-Clamp Fix And Thermal Paste Replacement
The most common RROD repair involves replacing thermal paste on the GPU and CPU, then modifying or replacing the plastic X-clamps that hold the heatsink assembly to the motherboard. The stock X-clamps can warp over time, reducing contact between the heatsink and chips.
Here’s the process:
- Power off completely and unplug the power supply from the console.
- Remove the case. You’ll need a security Torx T9 bit or a security T8 bit depending on your revision. The screws are under the warranty sticker, so you’re past that point anyway. Remove the faceplate, then unscrew the case.
- Locate the heatsink assembly. It’s the large metal structure cooling the GPU (closer to the center) and CPU (at the edge).
- Remove the thermal paste. Use isopropyl alcohol (90% or higher) and a soft brush or cloth to gently remove old paste from both the chips and the heatsink. Dried thermal paste insulates rather than conducts, which is why the console overheats.
- Apply new thermal paste. Use a high-quality thermal paste like Arctic Silver 5 or similar. Apply a small amount (pea-sized dot) to the GPU and CPU before reseating the heatsink. Too much paste is worse than too little, it reduces contact.
- Address the X-clamps (optional but recommended). The stock plastic X-clamps can be replaced with metal clamps or reinforced versions available online, or you can wrap the X-clamp area with electrical tape to add slight pressure. This isn’t strictly necessary if the heatsink already makes good contact, but it helps long-term.
- Reassemble carefully. Replace the heatsink screws, reinstall the shielding, reconnect all ribbon cables, and reseal the case.
This repair works best if the RROD is purely thermal. If the motherboard has more serious issues (cracked solder joints, component failure), thermal paste alone won’t fix it. Success rate is moderate, many units run for years after this repair, but some fail again within months if the damage was severe.
Improving Ventilation And Cleaning Internal Components
Even if you don’t replace thermal paste, internal dust accumulation drastically reduces cooling efficiency. Dust acts as insulation, trapping heat around components.
Before diving into full disassembly, try this: blow compressed air into the ventilation grilles on the sides and back of the console. Use short bursts and hold the console steady. Dust will billow out. Do this outdoors or in a well-ventilated area because it gets messy. Many RROD issues improve after a thorough dusting because the console can now dissipate heat properly.
For deeper cleaning, open the case and use compressed air to blow dust from the heatsink fins, the power supply, and the motherboard. Don’t touch components directly, let the air do the work. A soft brush can dislodge stubborn dust from heatsink fins.
After cleaning, position your console in a well-ventilated spot. Avoid enclosed shelving units where warm air recirculates back into the console. Horizontal placement is generally safer than vertical because it aids airflow. Ensure at least 4 inches of clearance on all sides, and keep the console away from other heat sources like radiators, sunlight, or other electronics.
Fixing Disc Drive Problems And Read Errors
Disc drive failures are common but often fixable without replacing the entire drive. Start with the least invasive fixes before committing to parts replacement.
Laser Lens Cleaning And Calibration
The disc drive’s laser lens collects dust and oxidation, blocking the beam and causing read errors. Cleaning the lens is the cheapest first attempt and works surprisingly often.
You’ll need to remove the disc drive from the console. Open the case as described earlier, unplug the power and data cables from the drive, and remove the mounting screws. The drive slides out carefully. Now you have access to the bottom, where the laser lens sits under a plastic cover.
The cover typically has a small hole. Gently use isopropyl alcohol (90% or higher) on a soft cotton swab to clean the lens through the hole. Make small, circular motions and avoid pressing hard. The goal is to remove dust and oxidized coating without scratching the lens. Clean until the swab comes away clean, then let it air dry completely before reinstalling.
Before reassembly, check the potentiometer (a small adjustable resistor on the drive circuit board). Some drives allow minor calibration by adjusting this component with a small screwdriver. This increases or decreases laser power to help the drive read discs more reliably. This requires some trial and error, turn it very slightly in one direction, test disc reading, and adjust again if needed. Be cautious because turning it too far in the wrong direction damages the lens permanently.
After cleaning and any adjustments, reinstall the drive, reconnect cables, reseal the console, and test with a disc you know previously failed. Success with this method means you’ve bought yourself more gaming time without spending money on parts.
Disc Drive Replacement Options
If cleaning doesn’t work, the laser is likely permanently damaged and you need a replacement drive. The Xbox 360 used different drive models across its lifespan (Hitachi, LG, Samsung, Benq variants), and compatibility depends on your console’s revision.
Your options:
- Used OEM drives from online sellers: Search eBay or specialized retro gaming sites for Xbox 360 disc drives matching your console’s revision. Prices range from $30-80 depending on condition and demand. The downside is you don’t know the drive’s lifespan, it might fail in months or work for years.
- Third-party replacement drives: Some aftermarket manufacturers sell replacement drives designed for Xbox 360. Quality varies, but they’re often cheaper ($20-50) than OEM units. Research reviews before buying.
- Jailbroken console drives: A jailbroken Xbox 360 can play burned discs, so if your drive is completely dead, replacing it with a jailbroken system offers more flexibility. But, this involves modifying the console’s firmware and is a separate consideration from standard repair.
Installation is straightforward: open the case, unplug the old drive’s cables, remove mounting screws, slide in the new drive, reconnect cables, and close it up. Test immediately with a game disc to confirm it reads. If it doesn’t, the issue might not be the drive itself, bad connections or motherboard problems could be at play.
Controller And Accessory Issues
Not every Xbox 360 problem lives in the console itself. Controllers and wireless receivers cause plenty of headaches, but many fixes are simple enough that even non-technical gamers can handle them.
Wireless Connection Problems
Wireless controllers occasionally lose connection, refuse to pair, or fail to power on. The issue could be the controller, the receiver, or both.
First, check the batteries. Weak batteries cause connection drops and failed pairing. Replace them with fresh AA batteries and try pairing again. If that doesn’t work, move the controller closer to the console (within 10 feet) during the pairing process. Sometimes distance or interference from other wireless devices prevents successful pairing.
To pair or repair a connection: press the connect button on the console’s receiver (usually on the front), then press the connect button on the controller within 20 seconds. LEDs will blink during pairing. If nothing happens after 20 seconds, the pairing failed.
If pairing consistently fails, the wireless receiver might be faulty. The receiver is a small USB dongle on the console. Try unplugging it for 10 seconds, then plugging it back in, sometimes this resets the connection. If that doesn’t work, the receiver likely needs replacement. Third-party receivers are available online for $15-30. Alternatively, if you have a spare controller or receiver lying around, test with it to pinpoint which part is failing.
For persistent connection dropouts during gameplay (not complete disconnection), the receiver might be too far from the controller or blocked by obstacles. Relocate it to a central console location and ensure line-of-sight between controller and receiver. Interference from Wi-Fi routers or other 2.4 GHz devices can also cause drops, though this is less common.
Button And Trigger Repairs
Controller buttons stick, triggers wear out, or the thumbsticks develop drift over time. These wear items are frustrating but often repairable without replacing the whole controller.
Sticky buttons: Often caused by spilled liquid or accumulated grime. Gently prying the button cap off (using a tiny flathead screwdriver) gives you access to the rubber dome underneath. Clean the rubber and the button housing with isopropyl alcohol on a swab. Let it dry completely before reassembling. If the button still sticks, the rubber dome might be permanently deformed and needs replacement (available as parts kits online).
Worn triggers: The trigger’s rubber grip can wear smooth, making it feel mushy and imprecise. Wrapping the trigger with a thin layer of electrical tape or rubberized grip tape adds texture and restores feel. Alternatively, replacement trigger housings are sold as parts for $5-10.
Thumbstick drift: A notorious issue where the stick registers movement without input. The potentiometers inside wear out. This is fixable but tedious: open the controller (usually four or five screws under the grips), access the thumbstick module, and clean or replace the worn potentiometer. Pre-assembled replacement thumbstick modules are easier, they’re sold online for $10-15 and just snap in place.
Most controller repairs take 10-20 minutes if you’re comfortable with small electronics. If you’d rather buy a new controller, the Xbox 360 Controller Not Turning On guide covers what to check before you assume it’s completely dead.
When To Seek Professional Repair Or Consider Replacement
DIY repairs work well for many issues, but some problems demand professional intervention or replacement. Knowing when to stop is important for your wallet and sanity.
Cost-Benefit Analysis Of DIY Versus Professional Services
DIY repairs cost $5-100 in parts (thermal paste, replacement drives, controller components) plus your time. Professional repair services typically charge $75-150 in labor plus parts, bringing the total to $150-300. For an old console, that’s expensive.
DIY makes sense if:
- The repair is straightforward (cleaning, thermal paste, controller fixes).
- You’re comfortable opening electronics.
- The parts are cheap ($5-30).
- You have tools available.
- You can afford to lose the console if something goes wrong.
Professional repair makes sense if:
- The problem is complex (motherboard component replacement, GPU rework).
- The console has sentimental value and you can’t afford to break it further.
- You lack confidence or tools.
- Warranty exists (some shops honor console warranties).
For consoles over 15 years old, the calculation shifts. You’re paying $150-300 to repair a console worth $80-150 on resale markets. If the repair is straightforward and cheap, go for it. If it requires expensive parts or professional soldering, consider replacement.
Finding Replacement Parts And Refurbished Units
If your console is beyond reasonable repair, you have options:
Used consoles: Sites like eBay and Facebook Marketplace have Xbox 360 consoles for $50-150 depending on model and condition. Look for consoles described as “tested and working” with included controllers and cables. Buy from sellers with strong ratings. The Xbox 360 Console for Sale market is active because many gamers prefer retro gaming.
Refurbished units: Some online sellers offer refurbished Xbox 360s that have been repaired and tested. These typically come with a limited warranty (30-90 days). Prices run $100-180 depending on model. The upside is verification that the console works. The downside is you can’t inspect it beforehand.
Different revisions: The Xbox 360 had several hardware revisions: the original (white), S (2010), and E (2013). The S and E models have better cooling and fewer RROD issues. If buying used or refurbished, prioritize the S or E revision. Xbox 360 Jasper consoles (a late-run original revision) also have improved reliability compared to earlier models.
Replacement parts for specific repairs: If you’re repairing, source parts from specialized retro gaming retailers. Generic online marketplaces sometimes sell counterfeit or low-quality parts. Reputable shops focus on quality and customer service, they’re worth the premium.
Before buying any replacement console, verify it includes controllers, a power supply, and ideally an AV cable. Factor those into your cost calculation.
Preventative Maintenance To Extend Your Console’s Lifespan
Prevention beats repair. A well-maintained Xbox 360 can run reliably for years, avoiding the frustrations that prompt these repairs in the first place.
Proper Storage And Environmental Conditions
Environment matters enormously for console longevity. Temperature and humidity affect component wear rates significantly.
Store and use your console in a room between 60-75°F. Consoles in warm environments work harder to cool themselves, stressing components and accelerating failure. Cold storage is also risky, when powered on, condensation can form inside if the temperature difference is too large. Moderate, stable temperature is ideal.
Humidity should stay between 30-50%. High humidity promotes corrosion inside the console and on circuit boards. Low humidity increases static electricity risk when handling components. If you live in a humid climate, a small dehumidifier near the console helps. In very dry climates, a static-dissipating wrist strap is good insurance when opening the console.
Avoid direct sunlight, which heats the console unnecessarily and can damage optical components in the disc drive. Keep the console away from heat sources like radiators, vents, or sunlit windows. If your gaming room is naturally warm, that’s fine, just ensure the console isn’t in the warmest spot.
Regular Cleaning And Cable Management
Dust accumulation is the #1 preventable cause of overheating and failure. Make cleaning a quarterly habit, not an annual emergency repair.
Monthly: Use compressed air to blow dust from the console’s exterior vents. Short bursts work best. Do this outdoors to avoid spreading dust everywhere. You’ll be amazed how much accumulates.
Quarterly: Open the case and use compressed air to clean interior components, heatsinks, power supply, motherboard. This takes 15 minutes and prevents thermal buildup. Don’t touch components, let air do the work.
Annually: If the console is used heavily, remove the disc drive and laser lens, clean the lens with isopropyl alcohol, and check thermal paste condition. Thermal paste can dry out over years, reducing cooling efficiency. If it looks discolored or crusty, fresh paste ($5-10) restores performance.
Cable management matters too. Bundled or pinched cables restrict airflow around the console’s ports and power supply. Arrange cables loosely and route them away from the console’s intake areas. A cable clips or velcro straps keep things organized and improve airflow. Good cable management also reduces tangling and accidental disconnections during gameplay.
For controllers, charge batteries regularly or use quality rechargeable batteries. Store controllers in a cool, dry place. Avoid leaving them powered on when not in use, this drains batteries and can degrade the wireless receiver. Using a Xbox 360 Controller for Xbox One is an option if your original controllers are worn, though this is a workaround rather than preventative maintenance of the original hardware.
These habits sound tedious, but they’re genuinely effective. A console that gets quarterly attention rarely develops problems, while one left to accumulate dust fails early and often.
Conclusion
The Xbox 360 was a legendary console, and many units are still gaming-ready today thanks to simple maintenance and repairs. Most failures, RROD, disc drive issues, controller problems, are fixable if you catch them early and know which direction to turn.
The key is diagnose first, repair second. A few dollars in thermal paste or a replacement disc drive costs far less than panic-buying a new console. Start with simple fixes (cleaning, fresh batteries, loose cable checks) before attempting teardowns. If you’re uncomfortable opening electronics or the repair costs rival the console’s resale value, professional service or buying refurbished is the smarter move.
Above all, maintain your console. Quarterly cleanings and proper storage prevent the majority of failures. A well-kept Xbox 360 will game on for years without headaches. Whether you’re running through classic library titles or settling into one final playthrough of a favorite, your console deserves the care it takes to keep running.